Migrating to SharePoint 2010
This post will show 2 possible scenarios to migrate from MOSS 2007 to SharePoint 2010. In order to demonstrate one of the worst case, we will start from a farm running MOSS 2007 SP1 on 32-bit Windows 2003 server OS. I have chosen two hybrid scenarios among those exposed in the Microsoft documentation Determine upgrade approach (SharePoint Server 2010) because there are safer since for each scenario we will upgrade on a copy of the farm:
1. Database attach with read-only databases
Lets you continue to provide read-only access to content in your MOSS 2007 web sites during the upgrade process. For this approach, you set the MOSS 2007 databases to read-only while the upgrade is in progress on another farm where SharePoint 2010 is deployed. This method reduces perceived downtime for your users.
2. In-Place upgrade with detached databases on a separate Farm
Lets you take advantage of an in-place upgrade's ability to upgrade content and settings, while adding the speed of a database attach upgrade. For this approach, you use an in-place upgrade to upgrade the farm and settings on a separate farm that is a copy of the farm, and to detach and upgrade multiple databases in parallel on this separate farm.
Before detailing the steps required for these scenarios I would like to draw up the list of the benefits and drawbacks of these hybrid scenarios comparatively to the two basic approaches (in-place and database attach):
Pros:
- Safer: you upgrade the content for the environment on a separate farm so you keep your old MOSS 2007 Farm intact.
- More service availability: Although the sites of your old MOSS 2007 Farm that are involved in the migration process are in read only mode, they still can display content to the users during the migration process. The sites that are not involved can be used as usual. This method reduces perceived downtime for your users.
- Faster upgrade time: You can upgrade multiple content databases at the same time, which results in faster upgrade times overall than an in-place upgrade.
- More flexibility: You can use a database attach upgrade to combine multiple farms into one farm that allows you to take advantage of the migration to reorganize your architectures.
- Cleaner: as you have to replicate all the environment configurations and customizations on the new farm, you will take advantage of this work to move only the necessary files and perform only the necessary configuration operations.
Cons:
- More expensive: Except if you are using virtualization, you will have to plan until twice more machines than for In Place upgrade.
- More work : You will have to replicate all your old Farm customizations on the new SharePoint 2010 Farm
And here are the pros and cons of these two hybrid scenarii:
1 - Database attach with read-only databases
Pros
If you’re running MOSS, each Shared Service Provider (SSP) and its settings will be upgraded and converted into new service applications. Source: Migrating to SharePoint 2010
Cons
you will have to mount a MOSS 2007 farm on 64-bit, then use an In Place uprade on the new farm for the settings, finally use an attach database upgrade for the content.
2 - In-place upgrade with detached databases on a separate Farm
Pros
You have not to upgrade your MOSS 2007 farm to 64-bit, then to upgrade it to SharePoint 2010, you save one step
Cons
For those running MOSS 2007, you should know that a database-attach upgrade won't fully upgrade your SSP into new service applications. When you attach an SSP database, only your user profile store is upgraded. Search settings, Excel Service settings, Business Data Catalog (BDC) application definitions, and other settings must be recreated from scratch. Source: Migrating to SharePoint 2010
Conclusion: if you have a lot of SSP settings like advanced search settings, wide use of Excel Services,etc. consider to use the scenario 2 otherwise, scenario 1 is quicker.
Steps of the migration
1 - upgrading the SharePoint Farm with MOSS 2007 SP2
2 - upgrading the SharePoint Farm with MOSS 2007 October 2009 Cumulative Updates
3 - running the pre-upgrade tool: pre-upgrade checker
4 - Scenario 1: performing database attach upgrade with read-only databases
4.1 - Building a SharePoint 2010 Farm
4.2 - Determining how to handle customizations
4.3 - Moving the customization to the SharePoint 2010 Farm
4.4 - Moving and Upgrading the Content to the SharePoint 2010 Farm
4.5 - Restoring and Upgrading the Content on the SharePoint 2010 Farm
5 - Scenario 2: In-place upgrade with detached databases on a separate Farm
5.1 - Copying the MOSS 2007 farm to upgrade to 64-bit
5.2 - Performing an in-place upgrade to upgrade the farm and settings
5.3 - Moving the Content to the SharePoint 2010 Farm
5.4 - Restoring and Upgrading the Content on the SharePoint 2010 Farm
5.5 - Fixing the customizations.
1 - Upgrading the SharePoint Farm with MOSS 2007 SP2
1.1 The different operations list
1.2 A sequence sample
For each hotfix the sequence will be the same.
First you will have to run the installation of binaries.
After the hotfix binaries installation, the SharePoint Products and technologies wizard will be launched,
There will be a first warning informing the system administrator that IIS, SharePoint Administration Service, SharePoint Timer Service may have to be started or reset.
But, more important there will be another message that will inform that the same upgrade operation has to be done on every Server of the Farm.
Then the wizard will perform the configuration steps.
It will inform the system administrator that the configuration was successfully
With this windows for WSS 3.0
and this one for MOSS 2007
Finally, when closing the wizard, the SharePoint Central Administration web site will be launched.
1.3 Validating the Upgrade
First of all let us check the version of our SharePoint Farm. You can check the version number on the settings page of any SharePoint site of the Farm, or in the Central Administration on the "Servers in Farm" Page.
You notice that SharePoint 2007 SP1 corresponding to this version number : 12.0.0.6219
What you have to check after having applied the WSS 3.0 SP2 upgrade, is obtaining this new version number : 12.0.0.6421
What you have to check after having applied the WSS 3.0 Language packs SP2 upgrade, is obtaining the updates information for the language packs in the "Add and Remove Programs" panel:
What you have to check after having applied the MOSS 2007 SP2 upgrade, is obtaining the update information for MOSS 2007 in the "Add and Remove Programs" panel:
It seems that there is no way to check the complete installation for MOSS 2007 language pack SP2, in my case, the "Add and Remove Programs" panel did not show the update information as you can notice on the above picture.
Now is the time to navigate through SharePoint Portals of the upgraded farm in order to check they still run perfectly well.
2 - Upgrading the SharePoint Farm with MOSS 2007 October 2009 Cumulative Updates
While it is enough to upgrade a MOSS 2007 Farm with SP2 to be allowed to migrate to SharePoint 2010, and that is the minimal step to get the SharePoint 2010 pre update checker installed, it is worth to upgrade the Farm with October 2009 Cumulative Updates in order to have the best version of the tool.
You will have to register to obtain them. The link to them will be sent to you by e-mail with the password to unzip them.
Then you will run them and the sequence will be the same than for the SP2.
Here are the screen shots of the "Add and Remove Programs" panel after the upgrade:
And you have to obtain this new version number after having run the update: 12.0.0.6520
3 - Running the pre-upgrade tool: pre-upgrade checker
Now that we have the best version of the SharePoint 2010 pre update checker installed, because we performed an update with October 2009 Cumulative Updates, we can now run the tool.
Open an command prompt and if the STSADM.exe path is registered in the environment variable of the machine, type the following command:
stsadm -o preupgradecheck
The tool runs and traces the Potential Upgrade Blocking Issues for a migration to SharePoint 2010.
It is also generated a more complete report in html format:
If we refer to the found blocking issues, they are totally normal since, the machine OS is in 32-bit and is not a Windows 2008 version, and SQL Server 2008 is in 32-bit and was not updated. I have also several SharePoint artifacts references in the content databases but the referenced files are no more present in the file system of the server. I should have to clean them although they are no more used by any site.
So what all does this mean? It means that we are not allowed to perform an upgrade on THIS machine (ie an In Place Upgrade), but there is good chances that a database attaches upgrade works...
4 - Scenario 1: performing a database attach upgrade with read only databases
In our case, an attach database upgrade requires two conditions:
- Having a SharePoint 2010 ready to use Farm to receive our machine databases
- Determine how to handle customizations
4.1 - Building a SharePoint 2010 Farm
In order to train for building such an environment, you can use my previous post: Installing SharePoint 2010 on Windows 2008 Server R2 that is an example of how to mount this kind of environment using only free and trial versions of the involved products for a development machine. If you want to mount a real production environment I have also provided links to the corresponding documentation.
Do not forget to install the same language packs as in your SharePoint 2007 source farm.
4.2 - Determining how to handle customizations
- the case of the compiled code.
Although customizations for SharePoint come in many forms (Site templates , Site definition, Feature, Workflows and server controls, Event handler, Web Parts, Master pages and CSS files, etc.) I would like to focus now on the compiled code.
There were many questions I have read on Forums and Blogs about "Do we have to recompile or rewrite the code for a migration to SharePoint 2010 ?".
I have found several answers and the good news is that in many cases neither rewriting the code nor even recompile it won't be necessary.
but I would like to display two excerpts of the Microsoft documentation that illustrates what you have to deal with :
Excerpt 1
[...
Existing applications
You must recompile existing 32-bit applications and custom assemblies (for example, Web Parts and event receivers) to run on the 64-bit architecture because the 64-bit edition of SharePoint cannot load a 32-bit assembly. Before you recompile existing applications or custom assemblies, verify that they are compiled to run on both architectures. If this is the case, do not compile them for a single architecture. (In Microsoft Visual Studio this build option is Any CPU.)
Excerpt 2
[...
Obsolete Classes and Namespaces
Because the changes to the API in the upgrades are backward compatible, you should not have to make any changes to your Windows SharePoint Services 3.0 or Office SharePoint Server 2007 custom solutions before you redeploy them in either SharePoint Foundation 2010 or SharePoint Server 2010. Some classes and namespaces are obsolete, but they will continue to work as expected. If you want to start upgrading your applications so that they use the most current classes and methods, recompile your code. The compiler warnings will tell you which elements of the object model are obsolete, and which newer alternatives you should use. Figure 3 shows an example compiler warning and the corresponding mouse-over warning in Visual Studio 2010.
..]
in Redeploying Customizations and Solutions in SharePoint Foundation 2010 and SharePoint Server 2010
So the philosophy is the following:
you can deploy a dll compiled for MOSS 2007 using the "Any CPU" or x64 build option on a SharePoint 2010 server and it will work using the 64-bit process, but if you want an optimized code you should recompile it with the new SharePoint 2010 object model. So in many case it won't be necessary to recompile but it is recommended to do it to optimize your code and to learn the new SharePoint 2010 object model.
I have published a first post on the topic: Migrating custom assemblies to SharePoint 2010 that explains some important concepts to take into account and gives an example for a Web Part , and am planning to detail some more operations for at least Event handler.
- other customization
I have not performed advanced searches on topic until now, but am planning to do it, and will certainly publish some posts on specific operations like I did for custom assemblies. Looking to the table listing the different kinds of customizations and the migration impact on it, presents in the Microsoft documentation (Determine how to handle customizations ), I see 4 main important areas to review:
- Information architecture - sites provisioning
Site definition and site templates
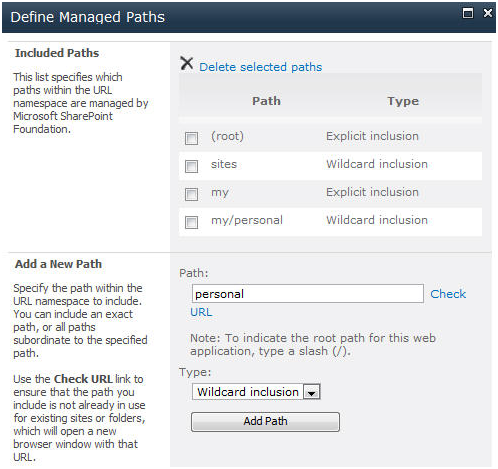
Managed paths (inclusions/exclusions)
- Look and Feel - UI Experience
Themes
Toolbar actions
Master pages and CSS files
- Custom code
Workflows and server controls
Event handler
Web Parts
Services
Authentication providers
Search provider or security trimmer
JavaScript
- Features
4.3 - Move Customizations to the SharePoint 2010 Farm
Depending on the decision you took about handling your customization, you can either move it on the SharePoint 2010 target platform and test it or rewrite it for SharePoint 2010 to take advantage of the new product benefits.
For the current tests, I have deployed SharePoint solutions (.wsp), installed features that was not packaged in .wsp, using the stsadm tool and typing exactly the same command lines than in SharePoint 2007 and during my content database upgrade, all the deployed files were retrieved by the upgrade process.
4.4 - Move Content to the SharePoint 2010 Farm
Once your customizations are properly handled for SharePoint 2010, it is the time to move the content. Here are the operations for an attach database upgrade.
First this is the Home page of one of the Web Application of the MOSS 2007 farm I am going to migrate. As you may notice, I took a standard site definition: the Collaboration Portal, with a few custom Web Parts and features as customizations.
Open SQL Server management studio and locate the Database you want to migrate and display its properties pane.
Set the Database Read Only to true
You will notice that the database icon will turn to gray
And that all the corresponding SharePoint site are now in read only mode.
Then perform a backup of the Database, and move this back up on your SharePoint 2010 Data Base Server.
4.5 - Restoring and upgrading the Content on the SharePoint 2010 Farm
First copy the back up of your SharePoint 2007 content database in the right folder to prepare to restore this backup.
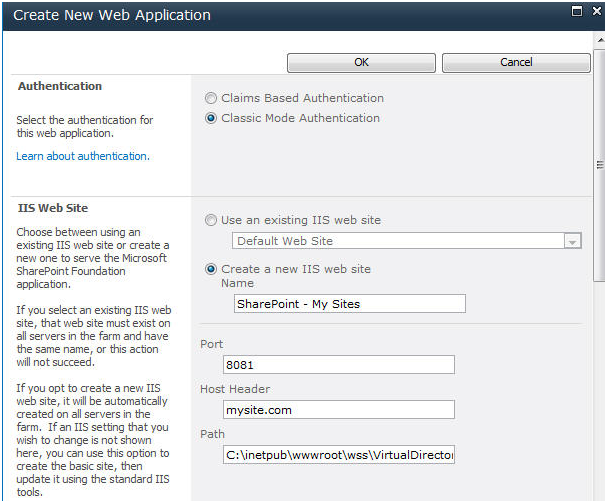
Then, create a new Web Application on your SharePoint 2010 farm to host the content database to be restored.
Then, open the SQL Server Management Studio of your SharePoint 2010 farm Database Server
Detach the content database...
to drop the existing connections
then, re attach the same database
You can now restore the database coming from the SharePoint 2007 farm
Do not forget to check the option: overwrite the existing database
Very important : grant the db_owner permissions to the Set-up account the wich you will be logged-in with when you will perform the upgrade for the new database, otherwise the upgrade will definitively fail!
and you will have this error in the log file
[STSADM] [SPUpgradeSession] [ERROR] [5/31/2010 11:56:27 PM]: Exception: Cannot open database "WSS_Content_WebApp81" requested by the login. The login failed.
Login failed for user 'VMDEV-012\Administrator'.
Finally, open a command prompt on a SharePoint 2010 server that hosts the SharePoint 2010 central Administration and type the following command:
stsadm -o addcontentdb -url yourWebApplicationUrl -databasename yourDatabasename -databaseserver yourdatabaseServerName
While the upgrade is being processed you will be informed of the percentage of data upgraded...
But more interesting, a page especially dedicated to upgrade status is available in the Central Administration Web site in SharePoint 2010 and is refreshing automatically giving you the number of warnings and errors encountered during the upgrade process, and informing you about the site that is involved by the upgrade process.
Finally, the upgrade process has been completed and you can review the upgrade log.
While there are some errors the Status will be "Failed", but it does not mean that your SharePoint site will not be available. For example, assume you have provisioned some files or a list by using a feature and that someone has removed the files or the list from the SharePoint site and removed the feature from the file system of the source farm without uninstalling it.
Your upgrade will be successful since the pages provisioned are no more required, but the reference of the feature is still in the SharePoint content database, and while the upgrade process does not find the feature in your SharePoint 2010 file system you will have an error and the upgrade will be set to "Failed", but you will be able to perfectly use all the functionalities of your upgraded SharePoint 2010 site.
and have a content database perfectly restored
In my case for a native Collaboration Portal of Moss 2007 I obtained several errors on missing features, because either they were missing in the MOSS 2007 farm file system anyway, or because I forgot to copy them in my new SharePoint 2010 server. But one was because it seems that the SharePoint 2010 release is missing a MOSS 2007 feature.
Warning : It seems that since the feature DocLibLanguageFiltering is missing on the Sharepoint 2010 release, while performing an upgrade of a site based on the document center site definition, you will always have this two errors:
[STSADM] [SPContentDatabaseSequence] [ERROR] [6/7/2010 1:01:32 AM]: Found a missing feature Id = [00bfea71-e717-4e80-aa17-d0c71b360102]
[STSADM] [SPContentDatabaseSequence] [ERROR] [6/7/2010 1:01:32 AM]: The feature with Id 00bfea71-e717-4e80-aa17-d0c71b360102 is referenced in the database [WSS_Content_WebApp-81], but is not installed on the current farm. The missing feature may cause upgrade to fail. Please install any solution which contains the feature and restart upgrade if necessary.
To fix this issue, take the feature on the MOSS 2007 farm, and install it on the SharePoint 2010 farm.
So, if you want a perfect upgrade without one single error, you will have to review the upgrade error log file, fix the error, then
remove the content db.
Close its connection by detach re attach it in SQL Server
Restore again the source farm content db backup
Set up the Administrator permissions
Perform an upgrade
Until you obtain that screen!
You have to change the permissions for the Site Collection administrator(s)
Then, check all the functionalities of the upgraded portal are available.
4.5 - Perform a Visual Upgrade
Now, if you really want to have a complete upgrade that allows you to take advantage of the new SharePoint 2010 user experience, you have to perform a Visual Upgrade, so locate the menu
Choose a preview or a definitive visual upgrade
Anyway, start enjoying the new UI of SharePoint 2010 by editing the home page and changing a label...
Well done !
5 - Scenario 2: performing an "In-place upgrade"
5.1 - Building a SharePoint Farm running MOSS 2007 64-bit on Windows server 2008 R2
will be published soon...
5.2 - Moving Customizations on SharePoint Farm running MOSS 2007 64-bit on Windows server 2008 R2
will be published soon...
5.3 - Performing In Place Upgrade
will be published soon...
5.1 - Moving and Upgrading Content on SharePoint Farm running MOSS 2007 64-bit on Windows server 2008 R2
will be published soon...